This post walks you through the steps for scheduling tasks with Spring Boot. Spring boot provides a
@Scheduled annotation to schedule tasks. The @Scheduled annotation is added to a method along with some
information about when to execute it, and Spring Boot takes care of the rest.
This tutorial is upgraded to Spring Boot 3 and Java 17.
If you have been already working on Spring or Spring Boot Application and you have a requirement to schedule
a task based on some interval, then these below two quick steps will help to set it up.
First, we will enable scheduling simply by adding the @EnableScheduling annotation to the main application
class or one of the Configuration classes.
Scheduling a task with Spring Boot is as simple as annotating a method with @Scheduled annotation, and providing a few parameters that will be used to decide the time at which the task will run.
Let's develop a complete example to demonstrate how to schedule tasks using Spring Boot.
We’ll build an application that prints out the current time every five seconds using Spring’s @Scheduled annotation. We will also look into useful attributes of @Scheduled annotation.
There are many ways to create a Spring Boot application. The simplest way is to use Spring Initializr at http://start.spring.io/, which is an online Spring Boot application
generator.
Use the following details while generating a Spring Boot project using Spring Initializr:
Once, all the details are entered, then click on Generate Project button will generate a spring boot project and downloads it. Next, Unzip the downloaded zip file and import it into your favorite IDE.
<?xml version="1.0" encoding="UTF-8"?>
<project xmlns="http://maven.apache.org/POM/4.0.0" xmlns:xsi="http://www.w3.org/2001/XMLSchema-instance"
 xsi:schemaLocation="http://maven.apache.org/POM/4.0.0 http://maven.apache.org/xsd/maven-4.0.0.xsd">
    <modelVersion>4.0.0</modelVersion>

    <groupId>net.guides.springboot2</groupId>
    <artifactId>springboot2-schedule-tasks</artifactId>
    <version>0.0.1-SNAPSHOT</version>
    <packaging>jar</packaging>

    <name>springboot2-schedule-tasks</name>
    <description>Demo project for Spring Boot</description>

    <parent>
        <groupId>org.springframework.boot</groupId>
        <artifactId>spring-boot-starter-parent</artifactId>
        <version>3.0.4</version>
        <relativePath /> <!-- lookup parent from repository -->
    </parent>

    <properties>
        <project.build.sourceEncoding>UTF-8</project.build.sourceEncoding>
        <project.reporting.outputEncoding>UTF-8</project.reporting.outputEncoding>
        <java.version>17</java.version>
    </properties>

    <dependencies>
        <dependency>
            <groupId>org.springframework.boot</groupId>
            <artifactId>spring-boot-starter-web</artifactId>
        </dependency>

        <dependency>
            <groupId>org.springframework.boot</groupId>
            <artifactId>spring-boot-starter-test</artifactId>
            <scope>test</scope>
       </dependency>
    </dependencies>

    <build>
        <plugins>
            <plugin>
                <groupId>org.springframework.boot</groupId>
                <artifactId>spring-boot-maven-plugin</artifactId>
            </plugin>
        </plugins>
    </build>
</project>
The Spring Boot Maven plugin provides many convenient features:
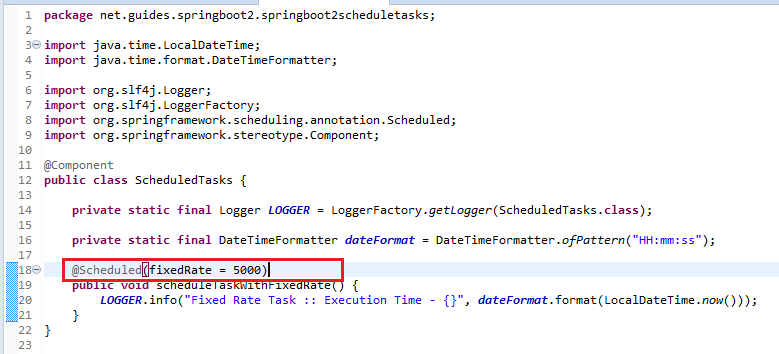
Now that we’ve set up our simple spring boot project, we can create a scheduled task. In this example, the reportCurrentTime() method is invoked every five seconds (measured between the successive start times of each invocation):
package net.guides.springboot2.springboot2scheduletasks;

import java.time.LocalDateTime;
import java.time.format.DateTimeFormatter;

import org.slf4j.Logger;
import org.slf4j.LoggerFactory;
import org.springframework.scheduling.annotation.Scheduled;
import org.springframework.stereotype.Component;

@Component
public class ScheduledTasks {

    private static final Logger LOGGER = LoggerFactory.getLogger(ScheduledTasks.class);

    private static final DateTimeFormatter dateFormat = DateTimeFormatter.ofPattern("HH:mm:ss");

    @Scheduled(fixedRate = 5000)
    public void reportCurrentTime() {
        LOGGER.info("Fixed Rate Task :: Execution Time - {}", dateFormat.format(LocalDateTime.now()));
    }
}
The @Scheduled annotation has the following useful attributes:
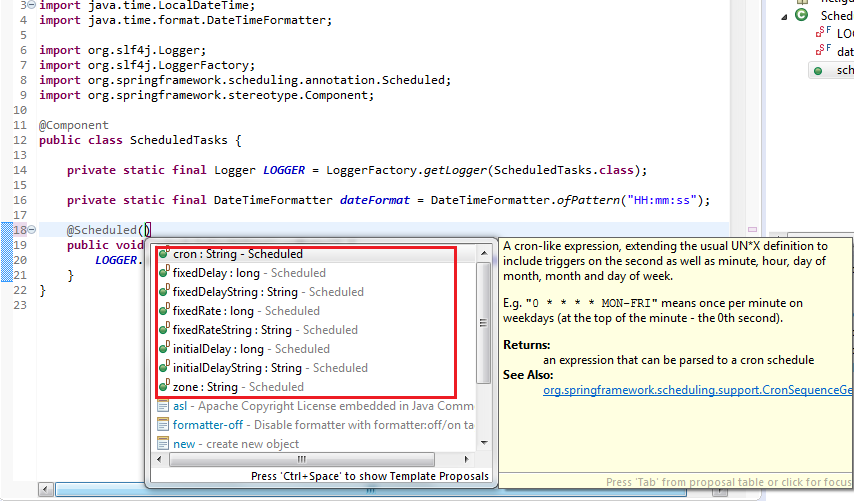
Execute the annotated method with a fixed period in milliseconds between the end of the last invocation and the start of the next.
@Scheduled(fixedDelay=5000)
public void doSomething() {
    // something that should execute periodically
}Execute the annotated method with a fixed period in milliseconds between the end of the last invocation and the start of the next.
@Scheduled(fixedDelayString = "${fixed.delay}")
public void doSomething() {
 // do something
}For fixed-delay and fixed-rate tasks, we can specify an initial delay by indicating the number of milliseconds to wait before the first execution of the method, as the following fixedRate example shows:
@Scheduled(initialDelay=1000, fixedRate=5000)
public void doSomething() {
    // something that should execute periodically
}If simple periodic scheduling is not expressive enough, we can provide a cron expression. For example, the following executes only on weekdays:
@Scheduled(cron="*/5 * * * * MON-FRI")
public void doSomething() {
    // something that should execute on weekdays only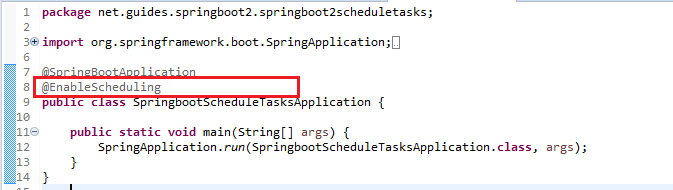
}We can enable scheduling simply by adding the @EnableScheduling annotation to the main
application class or one of the Configuration classes.
Open SpringbootScheduleTasksApplication.java and add @EnableScheduling annotation like
so -
package net.guides.springboot2.springboot2scheduletasks;

import org.springframework.boot.SpringApplication;
import org.springframework.boot.autoconfigure.SpringBootApplication;
import org.springframework.scheduling.annotation.EnableScheduling;

@SpringBootApplication
@EnableScheduling
public class SpringbootScheduleTasksApplication {

    public static void main(String[] args) {
        SpringApplication.run(SpringbootScheduleTasksApplication.class, args);
    }
} The main() method uses Spring Boot’s SpringApplication.run() method to launch an
application. Did you notice that there wasn’t a single line of XML? No web.xml file either. This web
application is 100% pure Java and you didn’t have to deal with configuring any plumbing or infrastructure.
@EnableScheduling ensures that a background task executor is created. Without it, nothing gets scheduled.
Two ways we can start the standalone Spring boot application.
java -jar target/springboot2-schedule-tasks.jar
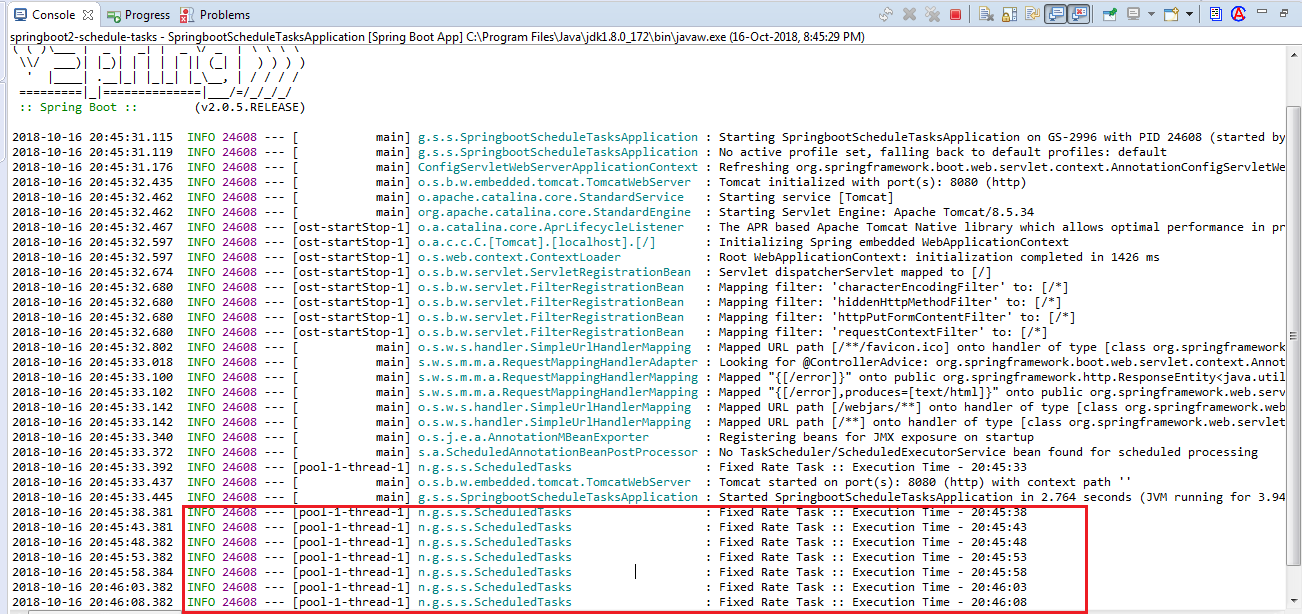
The following diagram shows, tasks are executed every five seconds:
Learn Spring Boot onSpring Boot 2 Tutorial
The source code of this tutorial is available on my GitHub repository.